

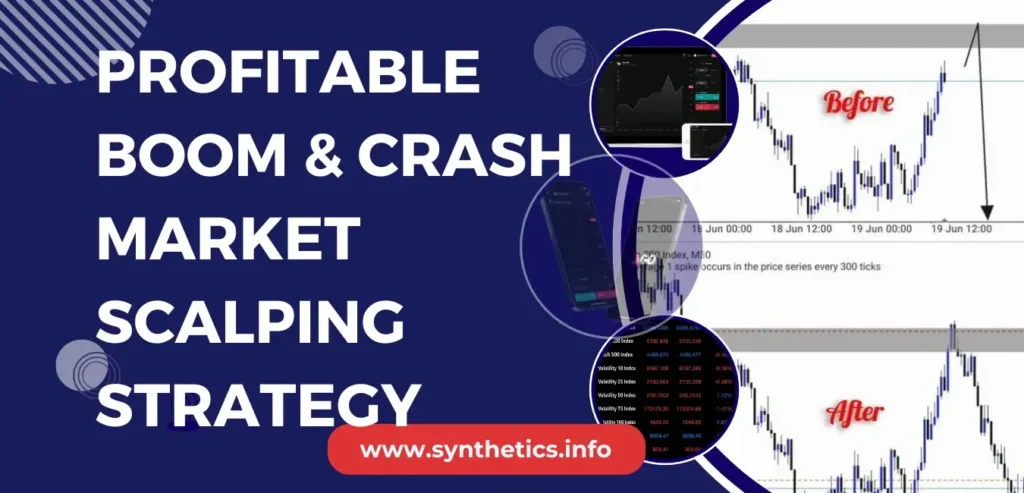

How I Moved from Random Entries to Consistent Spike Timing
Scalping Boom and Crash sounds easy until you start losing.
I used to jump in on every spike candle, thinking I’d caught “the one.” Sometimes it worked. Most times, it didn’t.
It wasn’t until I built a repeatable structure — trend + entry trigger + TP logic — that things started to turn around.
This guide breaks down the exact setup I now use across Boom 500, Boom 1000, Crash 1000, and even Boom 300.
I use no magic indicators or bots. My strategy simply uses structure, timing, and proper risk.
Min Deposit: USD 1
Total Pairs: 100+
Regulators: MFSA, LFSA, VFSC, BVIFSC
🔍 My Boom & Crash Scalping Setup in 3 Layers
🔹 1. Identify the Trend (H1 or H2)
I use higher timeframe candles to find the general direction and avoid trading against big bullish or bearish trends.
Be very careful here: don’t scalp when price is ranging or stuck between zones. The trades wont play out in your favour.
Example: If H1 on Boom 500 is forming higher highs and higher lows, look for buy opportunities only.
🔹 2. Wait for a Pullback or Zone Retest (M5/M15)
I then look for price pulling into a previous structure zone. My preferred signals are a clean wick rejection or engulfing candle near the level.
🖼️ Screenshot Example: Boom 500 – Bearish Pullback With Entry Wick
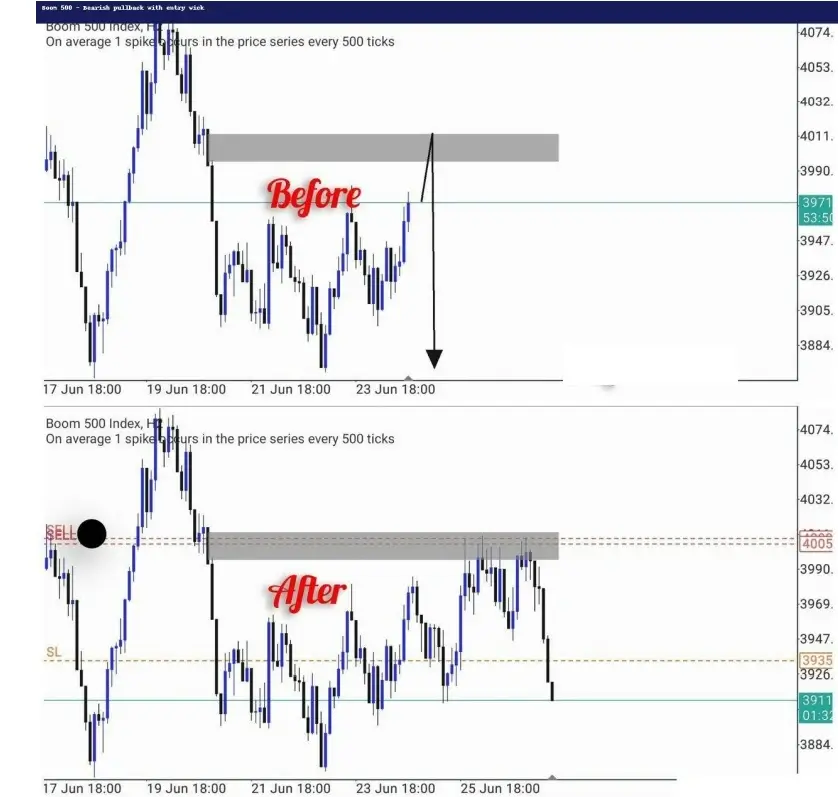
This played out nicely. Price pulled back into structure then formed a rejection wick and bearish the continuation ensured.
🔹 3. Confirm With Candle Logic
I don’t use indicators for entries anymore — just pure price action.
My entry logic usually involves seeing a wick rejection, then a strong bearish or bullish close.
Sometimes I look for a small M5 engulfing pattern for confirmtation
✅ 🖼️ Boom 600 – Spike + AO Confirmation Zone


Here the price pulled back into structure while the Awesome Oscilattor stayed red. To top is off, a bearish candle confirmed direction, then a clean spike followed.
Good example of scalping with the trend, using minimal confirmation.
📸 Example: Boom 500 – Bullish Rally with Spike Entries
- TP: Previous high or 1.5x risk
- Structure: Higher highs, higher lows showing that we are in an uptrend
- Zone: The price returns to a clean demand block
- Trigger: I used a bullish engulfing off the zone as a signal for entry
- Entry: First candle close after wick bounce
- Spike follow-through: Multiple spikes hit TP on the way up

🎯 TP and Stop Setup (My Personal Approach)
- Stop-Loss: Behind the zone or last candle high/low
- Take-Profit: 1.5× or 2× risk, or at next key level
Sometimes I trail TP if price breaks clean — but most days, I stick to spike, exit, done.

⚠️ Mistakes to Avoid With This Boom & Crash Scalping Strategy
- Scalping during ranges: You’ll catch late entries or weak spikes
- No structure = gambling: Don’t trade just because a spike “feels” due
- Over-leveraging small setups: If you risk too much per scalp, you won’t survive the losers
🧠 My Best Wins Came from Boring Trades
I’ve had my biggest winning streaks by just waiting for:
- A clean H1 trend
- A retest wick on M5
- And a proper candle close
That’s it.
📸 Real Trade Example: Boom 600 Sell Stack
Here’s a live setup I took recently on Boom 600, using the same logic from this guide — structure break, retest, zone rejection.

🔍 What you’re seeing above:
- 5 sell positions placed at 1.40 lots each
- All stacked within the same zone (around 5745)
- Partial exits started triggering around 5694 — a clean drop after zone rejection
Why this worked:
- There was a clear structure shift on H1
- Zone rejection was confirmed with a strong bearish candle
- I scaled in once the trade moved slightly into profit, keeping risk tight
This is how I use stacking when the setup is solid — not randomly. You don’t need to use big lots like this; the same logic works even with 0.2 lots on small accounts. Just respect your risk.

🧱 Want to Learn Structure First?
Scalping only works when your entries align with structure.
👉 Read the Market Structure Guide
📥 Download the PDF Guide (With More Charts)
Prefer a visual layout with all these chart examples marked and labeled?
👉 Download the Boom & Crash PDF Strategy Guide
🔗 Related Guides
💼 Looking for broker alternatives to Deriv?
Weltrade now offers synthetic-style instruments like Pain X 400 — but be cautious, they’re still new and may lack Deriv’s consistency.
👉 Check out Weltrade’s synthetic offering

🧠 Still not sure what synthetic indices are or how they work?
This guide breaks down how these simulated assets are designed to mimic real market conditions — without depending on news or time.
👉 Read what synthetic indices are
FAQs on Boom and Crash scalping strategy
Yes, but you need precision. These indices spike fast, so you’re not just looking for entries — you’re hunting the right zones, wicks, and follow-through candles.
I’ve had the most consistency on M5 and M15. They strike the right balance between signal clarity and trade frequency — especially when using spike zones.


💼 Recommended Brokers to Explore
Other Posts You May Be Interested In
Kiro: Free Binary Options Bot for Deriv Using Over 4 Strategy (2025)
📅 Last updated: June 22, 2025 ✍️ Written by: Jafar Omar ✅ Fact-checked by: Taylor [...]
How To Open A Deriv Real Synthetic Indices Account in 2026 ☑️
📅 Last updated: February 16, 2026 ✍️ Written by: Jafar Omar ✅ Fact-checked by: Taylor [...]
How to Trade Deriv Drift Switch Indices (DSI 10, 20, 30 Explained)
📅 Last updated: July 3, 2025 ✍️ Written by: Jafar Omar ✅ Fact-checked by: Taylor [...]
HFM Cent Account Review: Start Trading With A Small Deposit 🧾
📅 Last updated: October 31, 2023 ✍️ Written by: Jafar Omar ✅ Fact-checked by: Taylor [...]
Deriv Copy Trading Review✅ 2024: Exploring Deriv cTrader
📅 Last updated: December 12, 2023 ✍️ Written by: Jafar Omar ✅ Fact-checked by: Taylor [...]
10 Least Volatile Volatility Indices on Deriv (Full 2025 Guide) 🐢
📅 Last updated: June 12, 2025 ✍️ Written by: Jafar Omar ✅ Fact-checked by: Taylor [...]